Your yard doesn’t have to stay barren, confusing, or underused. If you’re looking for clear, practical ways to turn your outdoor area into a functional and beautiful extension of your home, this guide will walk you through it step by step. Many homeowners feel overwhelmed by where to begin, especially when it comes to backyard upgrade projects, budgeting, and design choices. Here, you’ll find actionable, budget-friendly strategies grounded in real-world home and garden transformations. From smart planning and layout ideas to simple decorative touches, we break the process down into manageable steps so you can confidently create an outdoor space you’ll actually use and enjoy.
Phase 1: Designing Your Dream Outdoor Space
Before you buy a single chair or plant, pause. Design beats impulse every time. The difference between a cohesive retreat and a cluttered yard often comes down to clarity.
-
Assess Your Needs
Dining vs lounging. Entertaining vs quiet retreat. A family with kids may prioritize open lawn space, while a couple might favor a fire pit and bistro seating. Neither is “better”—it’s purpose-driven design. List your top three activities and rank them. (Yes, you have to choose.) -
Create Functional Zones
Think patio vs deck: a patio feels grounded and social; a deck feels elevated and intimate. Add a grassy strip for play or pets, and a tucked-away bench for reading. Clear zones prevent your yard from feeling like a multipurpose parking lot. -
Consider Sun, Shade, and Flow
Full sun supports vegetable beds; partial shade suits lounge seating. According to the U.S. Department of Energy, strategic shade can reduce cooling costs by up to 25%. Smart placement isn’t just comfort—it’s efficiency. -
Set a Realistic Budget
Compare splurging on hardscaping now vs phasing in furniture later. Allocate intentionally to avoid stalled backyard upgrade projects.
Pro tip: Sketch two layouts—one practical, one aspirational—and merge the smartest elements.
Phase 2: Smart Planting for Year-Round Appeal
If there’s one hill I’ll happily die on, it’s this: low-maintenance plants are the REAL luxury. Native plants (species that naturally grow in your region) and hardy perennials (plants that return year after year) aren’t “boring” choices—they’re smart ones. They require less water, fertilizer, and fuss, which means fewer weekends sweating with a hose in hand. According to the EPA, native landscaping can significantly reduce water use compared to traditional lawns. I don’t know about you, but I’d rather enjoy my yard than constantly rescue it.
Layering is another move I swear by. Think of it like staging a photo: groundcovers at the base, mid-height shrubs for fullness, and taller accents or small ornamental trees for drama. This creates visual depth, meaning your space feels fuller and more intentional (not like a random garden center haul). It’s the difference between a flat set and a cinematic scene—very “HGTV reveal moment.”
Container gardening? UNDERRATED. Pots and planters give you flexibility to rotate color, control soil conditions, and refresh patios or entryways instantly. Pro tip: use high-quality potting mix to improve drainage and root health—it makes a noticeable difference.
And if you’re short on space, go vertical. Trellises, wall planters, and hanging baskets draw the eye upward and maximize growing area without crowding the floor. I’ve seen small balconies transformed with this approach.
For anyone tackling backyard upgrade projects, smart planting isn’t just practical—it’s the foundation of a yard that looks GOOD all year long.
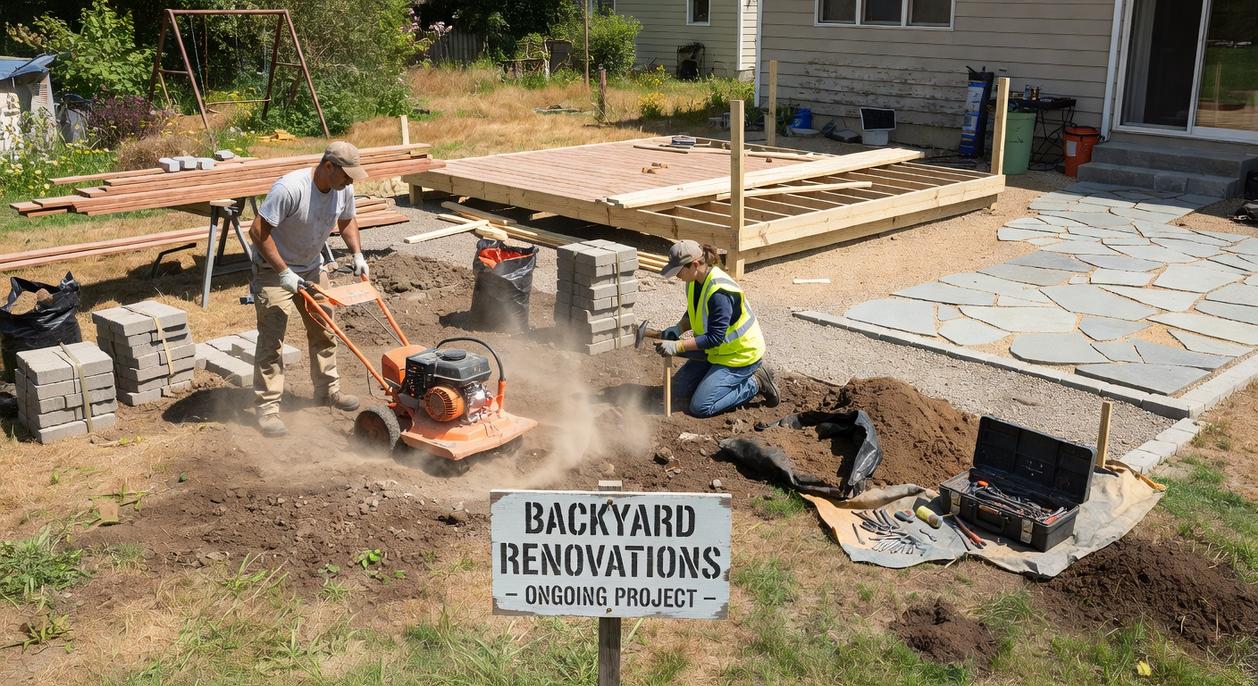
Phase 3: Building the Foundation with Hardscaping
Hardscaping refers to the non-living elements of your yard—patios, walkways, decks, and edging. Think of it as the skeleton that gives your outdoor space structure (plants are the décor; hardscaping is the architecture).
Choose Your Surface
Not all materials are created equal. Pea gravel is a small, rounded stone that’s affordable and beginner-friendly. It drains well and works beautifully for casual paths, though it can shift underfoot over time. Pavers, on the other hand, are manufactured concrete or stone units designed to interlock. They cost more but offer durability and a polished, classic look. According to HomeAdvisor, paver patios typically cost more upfront than gravel but last significantly longer with proper installation.
Define the Edges
Landscape edging—metal, plastic, or brick barriers—creates clean separation between lawn and beds. It prevents grass from creeping and keeps gravel contained (a small detail that makes a big visual difference).
DIY vs. Professional Help
Simple gravel paths are realistic DIY backyard upgrade projects. Larger builds like raised decks often require structural expertise.
Improve Drainage
Always slope surfaces slightly away from your foundation to prevent pooling.
Pro tip: Before tackling vertical features outdoors, review this step by step guide to installing floating shelves to sharpen your leveling skills.
Phase 4: Adding Ambiance and Functionality
This is where most people overspend—and oddly, underthink.
Strategic Outdoor Lighting doesn’t mean flooding your yard with brightness like a stadium. In fact, softer is smarter. Solar-powered stake lights can define pathways without driving up energy bills, while string lights create a warm halo over seating areas. The contrarian take? Less light often feels more luxurious. (Ever notice how high-end restaurants keep things dim?) Layered lighting adds depth and subtle drama.
Invest in Durable Furniture—but don’t assume “heavy” equals “high quality.” Teak, powder-coated aluminum, and premium resin wicker outlast bulky bargain sets that crack after one season. Weather-resistant materials protect both comfort and wallet long term.
Add a Focal Point to anchor backyard upgrade projects. A compact fire pit, a bubbling water feature, or sculptural art draws the eye and invites conversation. Function fuels ambiance. When every piece has purpose, the space feels intentional—not cluttered.
Your Outdoor Oasis Awaits
An underused yard doesn’t have to stay that way. You now have a clear, step-by-step path to transform it into a space you genuinely enjoy spending time in. With thoughtful planning, the right plant choices, a strong foundational layout, and a few well-placed features, your outdoor area can become both beautiful and functional.
The key is not to get overwhelmed. Start small. Choose one simple backyard upgrade projects idea this weekend—set up a container garden or install subtle path lighting—and build momentum from there.
Your yard has been waiting for attention. Take that first step today and start creating the outdoor space you’ve been wanting.